Mastering Digital Heat: A Practical Guide to Fire and Flame Procreate Brushes
Digital illustration offers unparalleled freedom, yet capturing the chaotic, organic nature of fire remains one of the most challenging tasks for artists. Whether you are designing dynamic character effects, creating atmospheric backgrounds, or adding dramatic lighting to a composition, standard round brushes often fall short. This is where specialized tools like Fire and Flame Procreate Brushes become essential. These assets are not merely decorative stamps; they are engineered to help you achieve realistic combustion effects with precision and speed on your iPad.
However, purchasing a new brush set is only the first step. Many creators, from seasoned professionals to enthusiastic beginners, encounter avoidable pitfalls when integrating these tools into their workflow. Understanding how to properly evaluate, install, and utilize these resources can significantly impact the quality of your final artwork and your overall efficiency.
Understanding Compatibility and File Formats
The most common and frustrating mistake users make involves compatibility assumptions. It is crucial to understand that Fire and Flame Procreate Brushes are designed exclusively for the Procreate app on iPad. They are not compatible with Photoshop, Clip Studio Paint, Procreate Pocket on iPhone (in some legacy cases), or desktop software. The files are delivered in the .brushset format, which is proprietary to Procreate’s ecosystem.
Before making a purchase, verify that you are using an iPad with Apple Pencil support and have the Procreate app installed. Attempting to use these files on unsupported devices leads to immediate disappointment and wasted time. Additionally, ensure your Procreate app is updated to the latest version. Older versions may not support newer brush engines or stamp functionalities, resulting in erratic behavior or missing features. Checking your software version takes seconds but saves hours of troubleshooting.
The Misconception of "One-Click" Realism
A frequent misunderstanding among beginners is the belief that specialty brushes automatically create perfect art without user input. While Fire and Flame Procreate Brushes are clean and easy to use, they are tools, not magic wands. Relying solely on the default settings without adjusting opacity, size, or color often results in flat, repetitive, and unnatural-looking flames.
Fire is dynamic. It changes color based on temperature, moves with wind, and interacts with its environment. If you stamp identical flame shapes in a row without variation, your artwork will look static and digital. To avoid this, treat the brushes as a foundation. Use them to establish the core shape and texture, then manually refine the edges, add glow layers, and adjust the color gradient to match your scene’s lighting. The best approach is to layer multiple stamps with varying opacities to build depth, rather than relying on a single heavy application.
Color Theory and Opacity Control
Another overlooked detail is the misuse of color. Many users apply these brushes in bright orange or red by default, ignoring the complex palette of real fire. Actual flames include whites, yellows, deep oranges, reds, and even blues or purples depending on the fuel source and heat. Using a single saturated color can make your fire look cartoonish or disconnected from the rest of the piece.
To achieve professional results, experiment with the color picker and opacity sliders. Start with a darker, cooler tone for the base and layer lighter, hotter colors toward the center of the flame. Utilize blending modes such as Screen, Add, or Color Dodge to make the fire appear luminous. Since these brushes allow you to use any color or opacity, take advantage of this flexibility. Test different combinations on a separate layer before committing to your final design. This iterative process ensures your fire integrates seamlessly with the surrounding elements.
Installation and Workflow Efficiency
Proper installation is critical for a smooth workflow. After purchasing, you will receive an email with a download link for the .brushset file. A common error here is trying to open the file directly from the email client or a cloud storage previewer. This often fails because the operating system does not recognize the file type outside of Procreate.
Follow these steps for a hassle-free setup:
- Download the File: Save the
.brushsetfile to your iPad’s Files app or a easily accessible location like iCloud Drive or Dropbox. - Open Procreate: Launch the Procreate app on your iPad.
- Import the Brushes: Tap on the brush icon to open the Brush Library. Then, tap the plus sign (+) or the import option, depending on your version. Navigate to where you saved the file and select it. Procreate will automatically install the entire set.
Once installed, organize your brushes. Move the new fire and flame stamps to a dedicated group within your Brush Library. This prevents clutter and allows you to access them quickly during intense creative sessions. Keeping your workspace organized reduces friction and helps maintain your creative flow.
Evaluating Quality and Usability
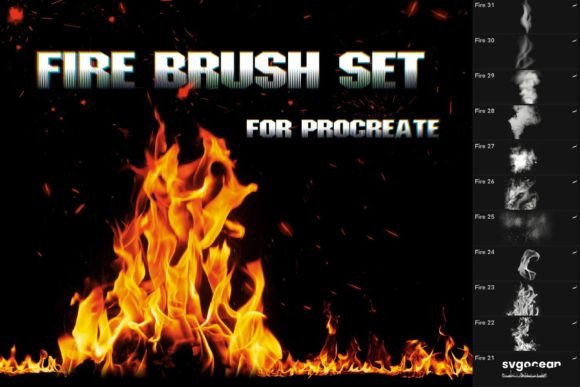
When considering digital assets, it is wise to evaluate their versatility. High-quality brushes like Fire and Flame Procreate Brushes should offer more than just a single shape. Look for variety in the stamp designs—some should represent small embers, others large plumes, and some subtle smoke trails. This variety allows you to construct complex fire scenes without repetitive patterns.
Additionally, consider the ease of use. The best brushes respond intuitively to pressure and tilt if applicable, though stamps primarily rely on placement. Ensure the brushes scale well without losing resolution. Pixelated edges break immersion and reduce the professional quality of your work. Test the brushes at various sizes to confirm they remain crisp and detailed.
Avoiding Overuse and Maintaining Artistic Integrity
Finally, beware of overusing specialty brushes. Just because you have a powerful tool does not mean every piece needs dramatic fire effects. Overapplication can clutter a composition and distract from the main subject. Use fire and flame elements purposefully to guide the viewer’s eye or enhance the narrative.
Ask yourself: Does this effect serve the story? Is the lighting consistent? Are the colors harmonious? By asking these questions, you ensure that your use of Fire and Flame Procreate Brushes enhances your art rather than overwhelming it. Remember, restraint often leads to more impactful and sophisticated results.
In conclusion, these brushes are a valuable addition to any digital artist’s toolkit, provided they are used with intention and technical understanding. By avoiding common mistakes regarding compatibility, color application, and installation, you can unlock the full potential of these tools. Take the time to experiment, layer, and refine your technique. With practice, you will be able to create stunning, realistic fire effects that elevate your digital illustrations to a professional standard.