Mastering Pencil Art Brushes for Professional Digital Illustration
Digital illustration has evolved significantly, yet the demand for organic, hand-drawn aesthetics remains higher than ever. Designers, marketers, and artists frequently seek tools that bridge the gap between traditional media and digital efficiency. This is where Pencil Art Brushes become indispensable. Unlike standard vector strokes that often appear sterile or overly uniform, high-quality pencil brushes replicate the texture, variance, and imperfection of graphite on paper. However, simply downloading a brush pack is not enough to guarantee professional results. Many creators overlook critical technical details regarding file formats, installation procedures, and customization options, leading to frustration and subpar design outputs.
Understanding the Value of Vector-Based Pencil Tools
When evaluating design assets, it is crucial to distinguish between raster images and vector-based tools. A common misconception among beginners is that all digital brushes function identically across different software. In reality, PENCIL ART BRUSHES designed for Adobe Illustrator offer distinct advantages over pixel-based alternatives. Because they are vector-based, typically distributed in AI and EPS10 formats, they remain infinitely scalable without losing resolution. This is particularly vital for entrepreneurs and small business owners who need logos, packaging designs, or large-format prints that maintain crisp edges regardless of size.
The core appeal of a comprehensive brush set lies in its versatility. A robust collection should include more than just a single style. Look for packs that offer over 100 variations, including thin sketch lines, thick shading strokes, hatching patterns, and cross-hatching textures. These elements allow you to apply realistic depth and dimension to any path. Furthermore, the ability to adjust size, color, and thickness dynamically within the software ensures that your workflow remains efficient. Instead of creating multiple static assets, you can manipulate one brush stroke to fit various contexts, saving hours of production time.
Common Mistakes in Selection and Usage
Even with high-quality assets, users often encounter pitfalls that hinder their creative process. One frequent error is ignoring the preview materials. Many designers download a set, install it immediately, and then struggle to identify which brush suits their specific project. The JPG preview included in most professional packages is not just a marketing image; it is a reference guide. Failing to study these samples means you might spend excessive time testing inappropriate brushes rather than selecting the right tool from the start.
Another significant oversight involves the misunderstanding of how vector brushes interact with paths. Novice users often attempt to draw freehand with a mouse or trackpad, expecting immediate artistic results. This approach rarely yields clean lines. The correct method involves creating a precise path using the Pen Tool or shape builders, then applying the brush stroke. If you skip this step, you lose the primary benefit of vector art: editability. By separating the path creation from the stylistic application, you retain full control over the curvature and direction of your lines, allowing for easy adjustments later.
Installation Errors That Limit Workflow
Perhaps the most frustrating issue for users is improper installation. Many beginners open the AI or EPS files and begin working directly within them, treating the sample artboard as their workspace. This is inefficient and risky. If you do not save the brushes to your permanent library, you must repeat the import process for every new document. This redundancy breaks creative flow and increases the likelihood of file corruption or loss.
To avoid this, you must understand the difference between temporary usage and permanent integration. When you open the provided EPS file, the brushes are only available for that specific session. To make them accessible across all future projects, you need to save them as a library. Neglecting this step means you are constantly re-importing assets, which is a poor use of time for freelancers and professionals managing tight deadlines.
Best Practices for Implementation and Editing
To maximize the utility of your Pencil Art Brushes, follow a structured workflow. Start by opening the AI or EPS file provided in your download package. Navigate to the menu bar and select Window > Brushes. This panel displays all available strokes. Observe the samples on the artboard; these serve as visual cues for what each brush does. For instance, some may mimic soft charcoal, while others resemble sharp mechanical pencil leads.
Once you have identified a suitable brush, create a new document for your actual project. Draw a path using any drawing tool, such as the Pen Tool, Pencil Tool, or even basic shapes like rectangles and circles. With the path selected, click on the desired brush in the Brush panel. The magic of vector brushes lies in their adaptability. You can instantly change the stroke weight, color, and opacity. If a line appears too heavy, reduce the stroke width. If the texture feels too dense, adjust the scaling options in the brush settings. This level of control allows for rapid iteration and refinement.
Creating a Permanent Brush Library
For long-term efficiency, installing the brushes into your global library is essential. Here is the correct procedure to ensure they are always available:
- Open the EPS file containing the brushes in Adobe Illustrator.
- Go to File > Save As and convert the file to AI format if it is not already. This ensures compatibility with newer software versions.
- Open the Brushes Panel via Window > Brushes.
- Click the options menu in the upper-right corner of the panel (usually represented by three horizontal lines).
- Select Save Brush Library.
- Name your library clearly, such as "Pencil Art Collection," and save it in the default location.
After restarting Illustrator, you can access these brushes in any new document by going to Window > Brush Libraries > User Defined (or the folder where you saved it). This simple step transforms a one-time asset into a permanent part of your toolkit, streamlining your workflow for years to come.
Leveraging Bonus Elements for Enhanced Design
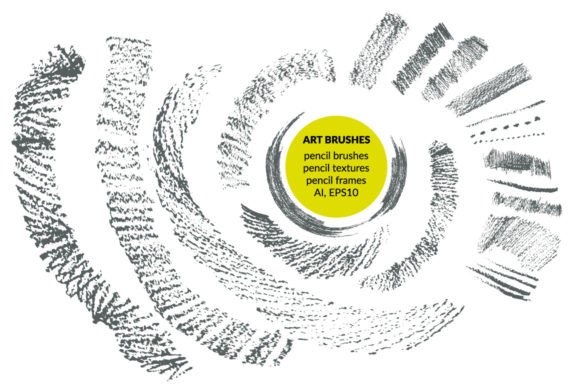
Many premium brush packs include bonus design elements, such as pencil textures and decorative frames. These are often underutilized. Textures can be applied as overlays to add grain and authenticity to flat digital colors, helping your work stand out in a saturated market. Frames created with pencil strokes can border quotes, images, or product highlights, adding a handcrafted feel to marketing materials. Integrating these elements requires the same attention to detail as the brushes themselves. Ensure that the texture resolution matches your output requirements and that frame strokes align visually with your main illustrations.
When evaluating a purchase or download, check for these extras. A pack that offers only basic lines may limit your creative potential, whereas a comprehensive set with textures and frames provides a holistic solution for various design projects. Whether you are creating social media graphics, educational materials, or brand identities, these additional assets can elevate the perceived quality of your work.
Making the Right Choice for Your Projects
Before committing to a specific set of PENCIL ART BRUSHES, consider your specific needs. Are you primarily working on detailed illustrations, or do you need quick sketches for storyboarding? Do you require hatching for shading, or just clean outlines? Understanding your workflow helps you choose the right tool. Additionally, verify the file formats. Ensure the pack includes EPS10 for maximum compatibility with older systems and AI for modern features. A JPG preview is also necessary for quick visual reference before installation.
By avoiding common installation errors, understanding the vector nature of the tools, and leveraging the full range of included assets, you can significantly enhance your digital artistry. The goal is not just to accumulate tools, but to integrate them seamlessly into your creative process. With the right approach, these brushes become an extension of your hand, allowing you to produce warm, organic, and professional-grade designs with speed and precision.